You’ve sourced Brett products to fulfil your job, but have you considered how you will lay it?
With any design project, especially those involving heavy products, you must consider many important factors before beginning the laying process. This blog discusses the steps required to cover basic concrete block paving installation and bring your new outdoor project to life.

Before You Begin – Preparing Before Your Paving Project
Start by drawing a plan for your project space.
In this sketch, map out where you would like your concrete blocks or paving flags to be applied. Once finalised, layout lengths of string to mark out the dimensions of your proposed landscaping project to gain a feel of the space it will inhabit.
Once you’re satisfied with your layout, you can begin installing the paving.
Step One: Preparing the Site
Depending on the size of the area you are going to pave, you can use a shovel or mini excavator to dig out to the advised level. It is recommended you dig out the area to a minimum depth of 150mm below damp proof course of your home. (Remember: our technical team is on hand to advise on the appropriate depth of your new project.) If you find soft spots in your soil, you must investigate whether further excavation is required. During the construction process, any spots can be filled and consolidated with sub-base material.
Step Two: Edge Restraints
It is essential that when preparing cement mix, you avoid directly handling cement.
When preparing the cement mixer, mix one-part cement with six parts of ballast to create a concrete foundation that is 100 mm thick, ready for the edge restraints. You must ensure that the edge restraint unit replacing the foundation will sit at the required finished level. This can be determined using a string line and spirit level.
The edge restraint can either be a kerb unit or a thick paving block (at least 60 mm in depth).
Next, mortar these units into the foundation using the trowel and rubber mallet and again using the cement, form a haunch up at least half the block’s height.
Step Three: The Sub-base
Apply a sub-base of MOT Type 1* materials with a rake and thoroughly ensure that you are compacting using the vibrating plate compactor in layers of 50 mm until your reach your desired level.
(*MOT Type 1 is crushed material used to provide a stable sub-base for road surfaces and pathways.)
Next, apply a 50 mm level of slightly damp, coarse sharp sand and compact down. Again, using the vibrating plate compactor, have this level compacted to an approximate depth of 35 mm.
A further 20 mm layer of sharp sand then must be applied and raked on top. Once these final layers are applied, using the screeding rails string line, level this area to the correct falls.
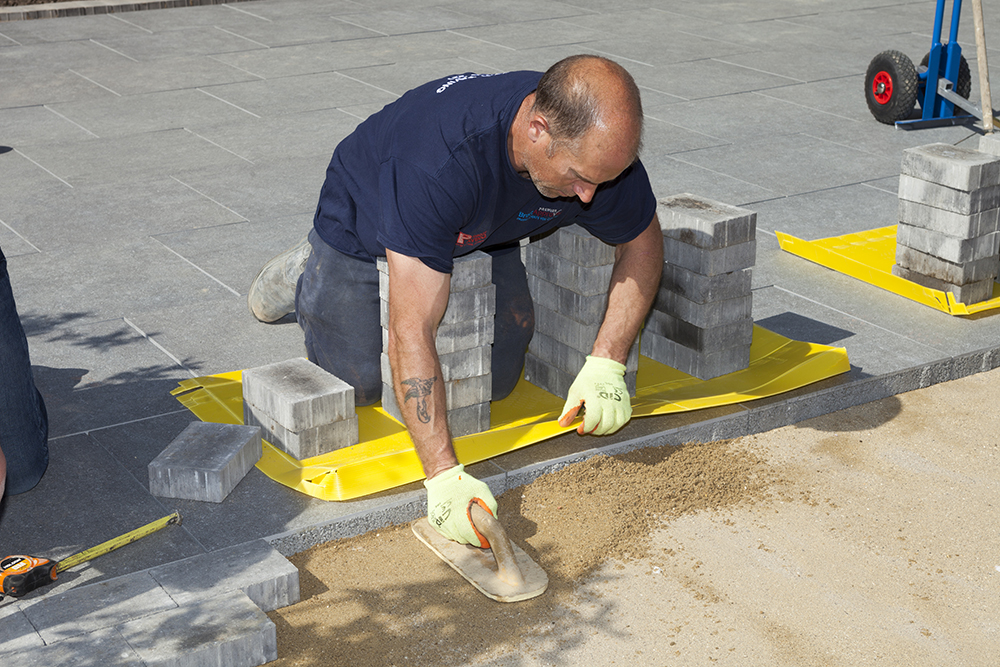
Step Four: Installation
It is essential that when lifting and carrying paving units, you consider the weight before attempting to move any product. You must avoid trapping your fingers while handling any paving units.
Ideally, start the installation process from a right angle or straight edge. Place your first block on top of the laying course, ensuring that they sit 5 mm proud of the finished level.
Following your desired laying pattern, ensure that you pick blocks from three or more different packs at one time. This minimises the risk of colour patching*.
(*Product-specific laying patterns are available to download here.)
Once all the blocks are in position, you will need to cut several to complete the area. You can achieve this using a block splitter or diamond disc cutter (whenever possible, always obtain water suppression cutting equipment).
Step Five: Finishing
Once all laid, using a yard broom, brush a suitable joint filler* into the paving joints and compact using the vibrating plate compactor.
(*To place an order for Brett kiln dried sand or permeable chippings please contact our customer service team on 0845 60 80 570)
Subsequently, you will need to top up the sand and re-compact to ensure that no joints are left unfilled.
And there you have it!
These steps cover the basic concrete paving installation, but if you require further support in installing concrete blocks or paving flags, contact your Brett customer service team on 0845 60 80 570 or find a Brett Approved Installer in your area here.
Sign up to our newsletter for our latest offers & inspiration