Capture it, transform it

We have a trusted team of Brett Approved Installers all over the UK who are experienced in the craft of installing our paving products for both garden and driveway renovations. However, we understand that some of our customers are eager to bring their ideas to life and install our products themselves. So, don’t worry, we’re here to support you every step of the way! To ensure you get the best experience from our materials, we’ve put together comprehensive installation guidance for each paving material – porcelain, concrete paving and block paving. So whether you want to know how to lay a patio or how to lay block paving, we’ve got you covered.

Remember, installing a patio or driveway with our high-quality paving products not only adds value to your property but also provides a sense of accomplishment and pride. We’re here to help you, every step of the way.

How to Lay A Patio Using Wet Cast Concrete Paving (Bronte, Canterbury & Stamford)

Brett products are beautiful materials, crafted to create your perfect patio. But like any design project, especially involving heavy products, you should consider a number of important factors before you begin. The type of paving you've chosen influences the installation method you should follow. If you've purchased Wet Cast Concrete Paving, such as our Bronte, Canterbury or Stamford Paving ranges, follow these steps required for patio installation.

If you require any further support, contact your Brett Customer Service team on 0845 60 80 570.


  • Mark and excavate the area for your patio, ensuring a depth of 170mm below the finished paving level. This depth accounts for the following layers: 100mm sub-base, 40mm bedding layer, and 30mm of paving slab. (Levels, longitudinal
  • minimum of 1-100, and cross falls, minimum 1-80 for the final pavement are constructed at the sub-grade level, this will allow the water to run off, and avoiding ponding on the finished pavement.
  • If the sub-base is to be constructed on weak ground,  then the soft areas will require a geotextile to be laid directly onto the ground prior to the installation of the sub-base.

IMPORTANT! When using excavation machinery, always follow the manufacturer’s guidelines, including the acceptable levels of exposure and, in particular, the recommended use of ear protection.


  • Install a Type 1 sub-base, ensuring a final compacted thickness of 100mm. Replicate the levels, longitudinal and cross falls from the sub-grade to allow proper water runoff and prevent ponding.
  • If you are unsure about the amount of surcharge needed for compaction, trial an area to determine the required amount. (Note: Think about the amount of surcharge required to achieve a compacted thickness of 100mm. As a rough guide, 125mm of uncompacted Type 1 will compact down to 100mm when fully compacted.)
  • Compact the sub-base thoroughly, ensuring a tight and dense surface to prevent loss of bedding course material during construction and use of the pavement.


  • Securely install edge restraints around the perimeter of the patio area before laying the bedding course and paving units.
  • The restraints should be robust enough to withstand traffic and should present a vertical face level with the underside of the bedding course and require haunching in concrete to the base and rear to mitigate lateral movement.


  • Prepare a stiff workable mix of M12 mortar, consisting of 1-part cement to 3 parts sharp sand or grit sand.This strong mix ensures frost resistance, and the stiffness supports the weight of the paving.
  • Place enough mortar onto the sub-base for one paving unit, distressing the surface if necessary to create ridges.The ridges achieve a full contact bed and prevent air pockets when the paving unit is tapped down.Do not use mortar dabs, as they can create voids or air pockets beneath the paving slab.
  • The final thickness of the bedding layer should be 40mm. The maximum working time for a mortar is typically up to 2 hours. After this time, fresh mortar should be used.


  • Place each paving unit onto the prepared bedding layer, ensuring full contact with the mortar.
  • Align the units to maintain proper line and level.
  • Compact the units using a paviour's maul, ensuring they do not rock after bedding. Any rocking flags should be lifted and re-laid as necessary.


  • Lay the paving slabs with joint widths typically ranging from 6mm to 10mm. Exclude the chamfer (if present) from the joint width measurement.
  • Prepare a designation M6 sand cement mortar with 1 part cement to 4 parts sand.Firmly press the mortar into the joints using a suitable pointing iron. 
  • Fill the joints to the full depth of the paving, leaving a gap of 2 to 3mm from the top surface.
  • Clean off any excess mortar from the surface of the paving immediately to avoid staining.
  • Allow at least 24 hours for the mortar to set before walking on the surface of the paving.During this time, protect the area from any heavy use or disturbance.

By following these step-by-step instructions, you can successfully install wet cast concrete paving as a patio or pavement, providing a durable and aesthetically pleasing outdoor space for your enjoyment.


How to Lay A Patio Using Hydraulically Pressed Concrete Paving (Chaucer, Meltone, Yorktone, Broadway & Quorndon)

Brett products are beautiful materials, crafted to create your perfect patio. But like any design project, especially involving heavy products, you should consider a number of important factors before you begin. The type of paving you've chosen influences the installation method you should follow. If you've purchased Hydraulically Pressed Concrete Paving, such as our Chaucer, Meltone, Yorktone, Broadway & Quorndon ranges, follow these steps required for patio installation. If you require any further support, contact your Brett Customer Service team on 0845 60 80 570.

Please note that hydraulically pressed paving can be installed using two methods: bound (with mortar) or unbound (with sand). The process of the installation of the subbase is the same for both methods however the bedding courses and jointing details differ. The following guide will walk you through the installation process for both methods. Before you begin, determine which method you prefer for your patio.


  • Determine the finished level of your patio, ensuring it is at least 150mm below the DPC (damp-proof course) of your building.
  • Excavate the area, removing 165 to 180mm of soil from the finished level to allow for a 100mm of subbase, 30mm of bedding layer and between 35-50mm for paving slab (depending on size of product chosen).
  • Levels for longitudinal and cross falls need to be constructed at the sub-grade to allow for water runoff of the final pavement.  Longitudinal falls are to be a minimum of 1-100 and cross falls a minimum of 1-80. 
  • If the pavement is to be constructed on weak ground, then the soft areas will require remediation and a geotextile to be laid directly onto the ground prior to the installation of the sub-base.


  • Install a Type 1 sub-base, ensuring a final compacted thickness of 100mm. Replicate the levels, longitudinal and cross falls from the sub-grade to allow proper water runoff and prevent ponding.
  • If you are unsure about the amount of surcharge needed for compaction, trial an area to determine the required amount. (Note: Think about the amount of surcharge required to achieve a compacted thickness of 100mm. As a rough guide, 125mm of uncompacted Type 1 will compact down to 100mm when fully compacted.)
  • Compact the sub-base thoroughly, ensuring a tight and dense surface to prevent loss of bedding course material during construction and use of the pavement.


  • Securely install edge restraints around the perimeter of the patio area before laying the bedding course and paving units.
  • The restraints should be robust enough to withstand traffic and should present a vertical face level with the underside of the bedding course and require haunching in concrete to the base and rear to mitigate lateral movement.


  • Prepare a stiff workable mix of M12 mortar, consisting of 1-part cement to 3 parts sharp sand or grit sand. This strong mix ensures frost resistance, and the stiffness supports the weight of the paving.
  • Place enough mortar on the bedding layer for one paving unit, distressing the surface if necessary to create ridges. The ridges help achieve a full contact bed and prevent air pockets when the paving unit is tapped down. Do not use mortar dabs, as they can create voids or air pockets beneath the paving slab.
  • The final thickness of the bedding layer should be 40mm. The maximum working time for a mortar is typically up to 2 hours. After this time, fresh mortar should be used.
  • Lay the paving unit onto the mortar, ensuring full contact and tap it down with a paviour's maul, ensuring they do not rock after bedding. Any rocking flags should be lifted and re-laid as necessary. Repeat this process for each paving unit, ensuring they are laid to line and level.
  • Lay the paving slabs with joint widths typically ranging from 6mm to 10mm. Exclude the chamfer (if present) from the joint width measurement.
  • Prepare a designation M6 sand cement mortar with 1 part cement to 4 parts sand. Firmly press the mortar into the joints using a suitable pointing iron.
  • Fill the joints to the full depth of the paving, leaving a gap of 2 to 3mm from the top surface.
  • Clean off any excess mortar from the surface of the paving immediately to avoid staining.
  • Allow at least 24 hours before walking on the paved surface. During this time, protect the area from any heavy use or disturbance.


  • Install a laying course with a pre-compacted thickness of 30mm in either of the below methods.
  • Method 1: Spread the material in one layer and compact it with a plate compactor. Loosen the top 10mm using a rake to accommodate slab thickness tolerances.
  • Method 2: Screed out 25mm of laying course material, compact it, and then screed out another 10mm of loose material for a total thickness of 30mm. Ensure the surface is level and smooth by screeding.
  • Place the paving units onto the laying course, ensuring a joint width of 2-5mm between the slabs. (this should not include any chamfers and the slabs should never be butt jointed. They are laid to line and level, with the use of string lines)
  • Use string lines to ensure proper alignment and compact the units with a paviour's maul. The units should not rock after bedding; adjust and re-lay any rocking flags.


  • If you desire a joint width wider than 5mm, use the bound installation method.
  • Fill the joints of the paving with kiln-dried silica joint filling sand.
  • Check and top up the joints as needed, especially in the early life of the patio when jointing material can be removed by wind and rain.

By following these step-by-step instructions, you can successfully install hydraulic concrete paving as a patio or pavement, providing a durable and aesthetically pleasing outdoor space for your enjoyment.


How to Lay Block Paving for Driveways and To Pedestrian and Cycle Areas.

Block Paving is to be installed in accordance with BS 7533 - 3:2005 A1: 2009, ‘Code of practice for laying precast concrete paving blocks and clay pavers for flexible pavements and shall follow the process set out in the flow chart, Annex A, figure A1.

There’s an art to laying block paving, but with the right materials, tools and Brett products, you could turn your art into a masterpiece. Simply follow this step-by-step guide of how to lay block paving, to achieve a driveway to be proud of.


  • Determine the finished paving level, keeping it at least 150mm below the DPC (damp-proof course) of the building.
  • Excavate the area to a depth of 230 to 240mm from the finished paving level to allow for 150mm of sub-base, 30mm of bedding layer and between 50 to 60mm depending on which type of concrete block paving is to be used.
  • Create falls in the sub-grade level with cross falls at 1.25% (1 in 80) and longitudinal falls at 1% (1 in 100). This will allow the water to run off, and avoiding ponding on the finished pavement.
  • If the ground is weak, repair soft areas and lay a geotextile directly on the ground prior to the installation of the sub-base.

IMPORTANT! When using excavation machinery, always follow the manufacturer’s guidelines, including the acceptable levels of exposure and, in particular, the recommended use of ear protection.


  • Construct a Type 1 sub-base with a final compacted thickness of 150mm, replicating the falls created in the sub-grade. (Note: Think about the amount of surcharge required to achieve a compacted thickness of 150mm. If you are not familiar with a material, trial an area to see how much surcharge is required. As a rough guide, 185mm of uncompacted Type 1 will compact down to 150mm when fully compacted. Install  the sub-base in a maximum of 100mm layer, compact each for final levels).
  • Ensure the surface of the sub-base is compact and dense to prevent loss of bedding course material.


  • Install secure edge restraints before laying the bedding layer and paving units.
  • The edge restraints should have a vertical face down to the level of the underside of the bedding course and require haunching in concrete to the base and rear to mitigate lateral movement.


  • Start the laying course installation once the sub-base is prepared. This layer provides a smooth level surface on which the block paving will be placed and then compacted into. 
  • Use sharp sand or grit sand as the laying course material, this should be installed to a pre-compacted thickness of 30mm:
  • Option 1: Spread the material in one layer and compact it using a plate compactor. Then loosen the top 10mm with a rake.
  • Option 2: Screed out 25mm of the laying course material, compact it, and then screed out an additional 10mm of loose material

(Note: The sand should be moist enough to bind together when squeezed in the hand, but not show moisture on its surface when opened. If there's a physical barrier between the sub-base and laying course, ensure drainage is in place to prevent moisture build-up. Fill voids with laying sand as you remove the screed rail. The final level should be about 3mm higher than intended as the blocks will settle into the sand during compaction).


  • Choose a suitable laying pattern considering the application and traffic flow.
  • Basket weave is suitable for pedestrian traffic.
  • Random stretcher course should be oriented perpendicular to traffic.
  • Herringbone pattern provides the strongest interlock and can be installed at a 90-degree or 45-degree orientation.


  • Set up temporary string-lines for alignment. Place a temporary string-line at the bottom corner of any sloped area created by falls. Set it up slightly inward from the pavement's edge restraint to align the first row of blocks.Set up a second string-line perpendicular to the first one to ensure courses remain aligned.With the string-lines in place, fill the area between them with block paving.
  • Start laying blocks at the edge restraint, working up the slope and beginning in one of the bottom corners.
  • Maintain a 3mm higher level for the blocks than the final finished level and keep joints between blocks typically at 2-5mm wide. (Do not butt joint blocks or rely on nibs for spacing as these are only provided to stop the edges of the blocks from coming into contact in transportation).
  • When installing more than one pack of paving it is important to pick blocks from a minimum of 3 packs at a time to ensure a thorough random colour mix, this should be done with any colour of blocks,  however it is critically important with multi-coloured blocks to avoid banding or patching. Blocks should be taken vertically from the packs in a diagonal manner rather than horizontally across the top of a pack. This will ensure an even distribution of colour throughout the installation and will disguise any slight colour variance which may be encountered between batches.
  • Maintain an open face while laying blocks for easier placement of adjacent blocks next to each other.
  • Move string-lines up the paved area as you work and make adjustments as needed.
  • Use a mechanical block splitter or saw to cut the blocks accurately, ensuring a joint width of 2-5mm. (Note: Cut blocks should be at least 1/3 of their original length, and blocks smaller than ¼ of their original size should not be used. Avoid cutting blocks along their length as it weakens them. If necessary, use inboard cutting away from the pavement edge).
  • Whenever possible, position the cut face of a block against an adjacent block chamfer instead of an edge restraint.
  • Do not load laying sand on the face of the blocks which you have installed to work from. Certain laying sands have a high iron content which, when damp, can leach out into the face of the paving. This will stain light coloured and textured block paving leaving an orange/brown stain. 


  • Compact the paving using a vibrating plate compactor.
  • For chamfered or pre-distressed edge blocks, compact the surface without joint filling sand initially.
  • For pencil edge blocks, spread joint filling sand over the surface before compaction to protect the edges of blocks and to stop them coming into contact with each other.
  • Inspect the paved surface, remove or remediate any cracked or chipped blocks.
  • Cover the surface with kiln-dried joint filling sand and compact again. We recommend that with our Invicta range that a rubber mat be used on the surface of the blocks to protect the face through this process. 
  • Complete compaction within 1m of any unrestrained edges at the end of each day of installation.


  • Sweep away excess sand from the surface of the blocks.
  • Apply a joint stabilising solution such as the Resiblock 22 range of products to prevent the removal of jointing material and water ingress into the laying course.
  • Ensure adjacent blocks do not differ in level by more than 2mm.
  • Check for irregularities or depressions on the surface of the paving, which should not exceed 10mm when measured with a 3m straight edge.

By following these step-by-step instructions, you can successfully install concrete block paving, providing a durable and hard-wearing driveway or pedestrian areas suitable for vehicular traffic.


How to Lay a Patio Using Porcelain Paving with A Traditional Bedding Mortar.

Porcelain paving requires a bound construction method, this requires the paving to be installed on a rigid mortar bed with 6mm to 10mm mortar or grout filled joints. Thought should be provided for the use of thermal expansion joints which should be installed in both directions at centres of between 2.7 to 3.0m, or against adjoining structures.


  • Determine the finished paving level, ensuring it is 150mm below the DPC (Damp Proof Course) level.
  • Excavate the ground to a depth to accommodate the chosen Sub-base method, this can either be 225mm of MOT Type 1 or 100mm of C20/25 Concrete. If using a Type 1 base then excavate 285mm from finished paving level to allow for 225mm of base, 40mm of bedding and 20mm of porcelain. If using the Concrete base then excavate 160mm from finished paving level to allow for 100mm of C20/25 concrete, 40mm of bedding and 20mm of porcelain.
  • Create falls in the sub-grade level with cross falls at 1.25% (1 in 80) and longitudinal falls at 1% (1 in 100). This will allow the water to run off and avoid ponding on the finished pavement.
  • Compact the formation level to ensure a stable foundation.


  • If installing onto weak ground, such as clay, lay a geotextile directly on the ground below the sub-base to prevent material from being forced under compaction. (Note: a geogrid can be used instead of geotextile, this can perform the same function but will also provide better stability to the sub-base material). 
  • If using the Type 1 Sub-base a final compacted thickness of 225mm needs to be achieved, replicating the falls which have been constructed at the sub-grade level. (Note: Install the sub-base in 100mm layers and compact each layer for final levels(Note: Think about the amount of surcharge required to achieve a compacted thickness of 100mm. If you are not familiar with a material, trial an area to see how much surcharge is required. As a rough guide, 125mm of uncompacted Type 1 will compact down to 100mm when fully compacted.) 
  • If using the C20/25 Concrete base has been chosen then a final thickness of 100mm needs to be achieved, replicating the falls which have been constructed at the sub-grade level. Generally the concrete should be left to cure for 28 days to achieve a 90% cure therefore mitigating any significant shrinkage of the concrete after this time.


  • Securely install edge restraints around the perimeter of the patio area before laying the bedding course and paving units
  • The restraints should be robust enough to withstand the desired traffic for the paving and should present a vertical face level with the underside of the bedding course and require haunching in concrete to the base and rear to mitigate lateral movement.


  • Create a stiff workable mix of 1-part cement to 3 parts sharp sand or grit sand. This mix is essential for frost resistance and to support the weight of the porcelain.
  • Ensure a full contact mortar bed, with no bedding on dabs.
  • Place enough mortar for the paving unit, and consider distressing the surface slightly to create ridges. This is sometimes known as ‘creating valleys’, ‘rippling’, ‘slicing through’, etc. This technique creates slightly higher ridges in the mortar so that when the paving unit is placed and tapped down, the ridges collapse into each other to help achieve a full mortar bed without air-pockets.
  • The final thickness of the mortar should be 40mm, so adjust the surcharge accordingly. (Note: Think about the amount of surcharge required to achieve the final thickness of 40mm. If you are not familiar with a mortar, trial an area to see how much surcharge is required. As a rough guide, 45 to 50mm of mortar will reduce down to 40mm.) 
  • The working time for the mortar is approximately 2 hours; after that, use fresh mortar.


  • If installing more than one pack of paving, ensure that the batch codes on each pack correspond and select paving from a minimum of 3 packs when installing.
  • Clean the backs of the slabs to remove any dust from the manufacturing process that could interfere with the bond between the bonding mortar, or primer, and paving unit. (Note: this dust contains magnesium oxide which is part of the releasing agent from the manufacturing process. This chemical compound can interrupt the bond.) 
  • Coat the back of each porcelain unit with a cementitious bonding mortar, or slurry primer. This is to increase the adhesion of the porcelain to the mortar bed for long-term performance.( Note: this is required due to the low water absorption characteristics of the porcelain. Slabs should not be wet prior to the bonding mortar, or slurry primer, being applied as this may negatively impact the bond between primer and paving unit).
  • Immediately place the porcelain paving on the mortar bed and tamp it to ensure it is level. (Note: when tamping into final position, use a rubber maul and we would suggest using a lighter coloured maul for lighter paving colours, to avoid leaving any marks on the tamped paving).
  • Use spacers between adjacent paving units to maintain a consistent 5 to 6mm joint width. (Note: never butt joint, this is when the adjacent units are in contact with each other). 
  • Clean off any mortar or slurry stains from the face of the paving as you work, rather than waiting until the end of the day.
  • Allow at least 24 hours before walking on the surface.


  • Use a continuous diamond cutting blade on a bench-mounted saw with sufficient water being applied for cooling and dust suppression during cutting.
  • Mark out the cuts on the face of the unit and cut on the top surface, starting with low RPM and increasing to 10,000 RPM for a clean-cut face.


  • Carefully fill and finish the joints according to the manufacturer's recommendations.
  • Avoid leaving any jointing residue on the face of the paving, as it can compromise the final appearance. If in doubt, we would suggest seeking advice on how to apply from the manufacturer and carry out a trial in a discreet area before committing to the entire installation. Don’t underestimate the effort that may be required to remove any residue! 
  • Consideration should be given to the working method (for any preferences you may have) and working times of the different jointing materials. 
  • Grouting – wide range of colour options are available, ensure a suitable product is used for external applications and any other features (e.g. swimming pools, etc.) 
  • Cementitious Jointing – various colour options from different suppliers. These products can be either slurry applied, or gun applied. 


How to Lay a Patio Using Porcelain Paving with A Permeable Bedding Mortar.

Installing Porcelain Paving with the use of a permeable bedding is intended to relieve any water that may enter the pavement during the jointing process (depending on the jointing material being used) and any water that may seep through any hairline cracks and/or imperfections between the jointing and the paving. This allows any water to escape and prevents any possible damage due to the water freezing. Surface water runoff is still intended and should be allowed for. The overall pavement is not intended to be used as a permeable pavement, such as a part of a sustainable drainage system. Thought should be provided for the use of thermal expansion joints which should be installed in both directions at centres of between 2.7 to 3.0m, or against adjoining structures.


  • Determine the finished paving level, ensuring it is 150mm below the DPC (Damp Proof Course) level.
  • Excavate the ground to a depth to accommodate the chosen Sub-base method, this can either be 225mm of MOT Type 1 or 100mm of C20/25 Concrete. If using a Type 1 base then excavate 285mm from finished paving level to allow for 225mm of base, 40mm of bedding and 20mm of porcelain. If using the Concrete base then excavate 160mm from finished paving level to allow for 100mm of C20/25 concrete, 40mm of bedding and 20mm of porcelain.
  • Create falls in the sub-grade level with cross falls at 1.25% (1 in 80) and longitudinal falls at 1% (1 in 100). This will allow the water to run off and avoid ponding on the finished pavement.
  • Compact the formation level to ensure a stable foundation.


  • If installing onto weak ground, such as clay, lay a geotextile directly on the ground below the sub-base to prevent material from being forced under compaction. (Note: a geogrid can be used instead of geotextile, this can perform the same function but will also provide better stability to the sub-base material). 
  • If using the Type 1 Sub-base a final compacted thickness of 225mm needs to be achieved, replicating the falls which have been constructed at the sub-grade level. (Note: Install the sub-base in 100mm layers and compact each layer for final levels (Note: Think about the amount of surcharge required to achieve a compacted thickness of 100mm. If you are not familiar with a material, trial an area to see how much surcharge is required. As a rough guide, 125mm of uncompacted Type 1 will compact down to 100mm when fully compacted.) 
  • If using the C20/25 Concrete base has been chosen then a final thickness of 100mm needs to be achieved, replicating the falls which have been constructed at the sub-grade level. Generally, the concrete should be left to cure for 28 days to achieve a 90% cure therefore mitigating any significant shrinkage of the concrete after this time.
  • When using permeable jointing and bedding mortars, thought should be taken to the draining of the bedding mortar through the concrete base. 50mm holes should be drilled on a 2m grid and require filling with a 2-6.3mm permeable chipping prior to the installation of the mortar bed.


  • Securely install edge restraints around the perimeter of the patio area before laying the bedding course and paving units.
  • The restraints should be robust enough to withstand the desired traffic for the paving and should present a vertical face level with the underside of the bedding course and require haunching in concrete to the base and rear, to mitigate lateral movement.


  • A suitable bagged permeable mortar should be used, this mix is essential for frost resistance and to support the weight of the porcelain. Suggested suppliers are Parex, Fuga-Pave, Sika and Instarmac.
  • Ensure a full contact mortar bed, with no bedding on dabs.
  • Place sufficient mortar for the paving unit which is to be laid and only likely distress the mortar’s surface. Permeable mortar moves a lot less than a traditional mortar, so any ‘rippling’, ‘slicing through’, etc should be minimal but a full contact mortar bed after tamping down is still required. 
  • The final thickness of the mortar should be 40mm, so adjust the surcharge accordingly. Due to the grading of the aggregates, the initial placing of the mortar needs to be much more accurate as there isn’t the ability to tamp down the depth of mortar in the same way a traditional sand cement mortar performs. (Note: Think about the amount of surcharge required to achieve the final thickness of 40mm. If you are not familiar with a mortar, trial an area to see how much surcharge is required).
  • The working time for a permeable mortar is approximately 30 to 45 minutes; after that, use fresh mortar.


  • If installing more than one pack of paving, ensure that the batch codes on each pack correspond and select paving from a minimum of 3 packs when installing.
  • Clean the backs of the slabs to remove any dust from the manufacturing process that could interfere with the bond between the bonding mortar, or primer, and paving unit. (Note: this dust contains magnesium oxide which is part of the releasing agent from the manufacturing process. This chemical compound can interrupt the bond.) 
  • Coat the back of each porcelain unit with a cementitious bonding mortar, or slurry primer. This is to increase the adhesion of the porcelain to the mortar bed for long-term performance. (Note: this is required due to the low water absorption characteristics of the porcelain. Slabs should not be wet prior to the slurry primer being applied as this may negatively impact the bond between primer and paving unit).
  • Immediately place the porcelain paving on the mortar bed and tamp it to ensure it is level. (Note: when tamping into final position, use a rubber maul and we would suggest using a lighter coloured maul for lighter paving colours, to avoid leaving any marks on the tamped paving).
  • Use spacers between adjacent paving units to maintain a consistent 5 to 6mm joint width. (Note: never butt joint, this is when the adjacent units are in contact with each other). 
  • Clean off any mortar or slurry stains from the face of the paving as you work, rather than waiting until the end of the day.
  • Allow at least 24 hours before walking on the surface.


  • Use a continuous diamond cutting blade on a bench-mounted saw with sufficient water being applied for cooling and dust suppression during cutting.
  • Mark out the cuts on the face of the unit and cut on the top surface, starting with low RPM and increasing to 10,000 RPM for a clean-cut face.


  • Carefully fill and finish the joints according to the manufacturer's recommendations.
  • Avoid leaving any jointing residue on the face of the paving, as it can compromise the final appearance. If in doubt, we would suggest seeking advice on how to apply from the manufacturer and carry out a trial in a discreet area before committing to the entire installation. Don’t underestimate the effort that may be required to remove any residue! 
  • Consideration should be given to the working method (for any preferences you may have) and working times of the different jointing materials. 
  • Grouting – wide range of colour options are available, ensure a suitable product is used for external applications and any other features (e.g., swimming pools, etc.) 
  • Cementitious Jointing – various colour options from different suppliers. These products can be either slurry applied, or gun applied. 


How to Lay Invicta Block Paving for Driveways and to Pedestrian and Cycle Areas.

Block Paving is to be installed in accordance with BS 7533 - 3:2005 A1: 2009, ‘Code of practice for laying precast concrete paving blocks and clay pavers for flexible pavements and shall follow the process set out in the flow chart, Annex A, figure A1.

When installing textured block paving, such as Invicta & Lugano, the blocks needs to be kept clean through construction to stop any staining of the blocks which may be apparent at completion of the installation. It is therefore imperative that the installer does not store any of the laying course on the surface of the paving ready to screed out and if there is any excess material on the face of the blocks,  it needs to be removed immediately by sweeping.

  • Determine the finished paving level, keeping it at least 150mm below the DPC (damp-proof course) of the building.
  • Excavate the area to a depth of 240 to 260mm from the finished paving level to allow for 150mm of sub-base, 30mm of bedding layer and between 60 to 80mm depending on which type of concrete block paving is to be used.
  • Create falls in the sub-grade level with cross falls at 1.25% (1 in 80) and longitudinal falls at 1% (1 in 100). This will allow the water to run off, and avoiding ponding on the finished pavement.
  • If the ground is weak, repair soft areas and lay a geotextile directly on the ground prior to the installation of the sub-base.

  • Construct a Type 1 sub-base with a final compacted thickness of 150mm, replicating the falls created in the sub-grade. (Note: Think about the amount of surcharge required to achieve a compacted thickness of 150mm. If you are not familiar with a material, trial an area to see how much surcharge is required. As a rough guide, 185mm of uncompacted Type 1 will compact down to 150mm when fully compacted. Install  the sub-base in a maximum of 100mm layer, compact each for final levels.  )
  • Ensure the surface of the sub-base is compact and dense to prevent loss of laying course material.

  • Install secure edge restraints before laying and screeding the bedding course and paving units.
  • The edge restraints should have a vertical face down to the level of the underside of the bedding course and require haunching in concrete to the base and rear to mitigate lateral movement.

  • Start the laying course installation once the sub-base is prepared. This layer provides a smooth level surface on which the block paving will be placed and then compacted into. 
  • Use sharp sand or grit sand as the laying course material, this should be installed to a pre-compacted thickness of 30mm:
  • Option 1: Spread the material in one layer and compact it using a plate compactor. Then loosen the top 10mm with a rake.
  • Option 2: Screed out 25mm of the laying course material, compact it, and then screed out an additional 10mm of loose material
  • (Note: The sand should be moist enough to bind together when squeezed in the hand, but not show moisture on its surface when opened. If there's a physical barrier between the sub-base and laying course, ensure drainage is in place to prevent moisture build-up. Fill voids with laying sand as you remove the screed rail. The final level should be about 3mm higher than intended as the blocks will settle into the sand during compaction).

  • Choose a suitable laying pattern considering the application and traffic flow.
  • Basket weave is suitable for pedestrian traffic.
  • Random stretcher course should be oriented perpendicular to traffic.
  • Herringbone pattern provides the strongest interlock and can be installed at a 90-degree or 45-degree orientation.

  • Set up temporary string-lines for alignment. Place a temporary string-line at the bottom corner of any sloped area created by falls. Set it up slightly inward from the pavement's edge restraint to align the first row of blocks. Set up a second string-line perpendicular to the first one to ensure courses remain aligned. With the string-lines in place, fill the area between them with block paving.
  • Start laying blocks at the edge restraint, working up the slope and beginning in one of the bottom corners.
  • Maintain a 3mm higher level for the blocks than the final finished level and keep joints between blocks typically at 2-5mm wide. (Do not butt joint blocks or rely on nibs for spacing as these are only provided to stop the edges of the blocks from coming into contact in transportation).
  • When installing more than one pack of paving it is important to pick blocks from a minimum of 3 packs at a time to ensure a thorough random colour mix, this should be done with any colour of blocks,  however it is critically important with multi-coloured blocks to avoid banding or patching. Blocks should be taken vertically from the packs in a diagonal manner rather than horizontally across the top of a pack. This will ensure an even distribution of colour throughout the installation and will disguise any slight colour variance which may be encountered between batches.
  • Maintain an open face while laying blocks for easier placement of adjacent blocks next to each other.
  • Move string-lines up the paved area as you work and make adjustments as needed.
  • Use a mechanical block splitter or saw to cut the blocks accurately, ensuring a joint width of 2-5mm. (Note: Cut blocks should be at least 1/3 of their original length, and blocks smaller than ¼ of their original size should not be used. Avoid cutting blocks along their length as it weakens them. If necessary, use inboard cutting away from the pavement edge).
  • Whenever possible, position the cut face of a block against an adjacent block chamfer instead of an edge restraint.
  • Do not load laying sand on the face of the blocks which you have installed to work from. Certain laying sands have a high iron content which, when damp, can leach out into the face of the paving. This will stain light coloured and textured block paving leaving an orange/brown stain. 

  • Compact the paving using a vibrating plate compactor. We recommend that with our Invicta range that a rubber mat be used on the surface of the blocks to protect the face through this process.
  • For chamfered or pre-distressed edge blocks, compact the surface without joint filling sand initially.
  • For pencil edge blocks, spread joint filling sand over the surface before compaction to protect the edges of blocks and to stop them coming into contact with each other.
  • Inspect the paved surface, remove or remediate any cracked or chipped blocks.
  • Cover the surface with kiln-dried joint filling sand and compact again. 
  • Complete compaction within 1m of any unrestrained edges at the end of each day of installation.

  • Sweep away excess sand from the surface of the blocks.
  • Apply a joint stabilising solution such as the Resiblock 22 range of products to prevent the removal of jointing material and water ingress into the laying course.
  • Ensure adjacent blocks do not differ in level by more than 2mm.
  • Check for irregularities or depressions on the surface of the paving, which should not exceed 10mm when measured with a 3m straight edge.

By following these step-by-step instructions, you can successfully install Invicta block paving (60mm & 80mm), providing a durable and hard-wearing driveway or pedestrian areas suitable for domestic vehicular traffic.

Safe Working Guidelines

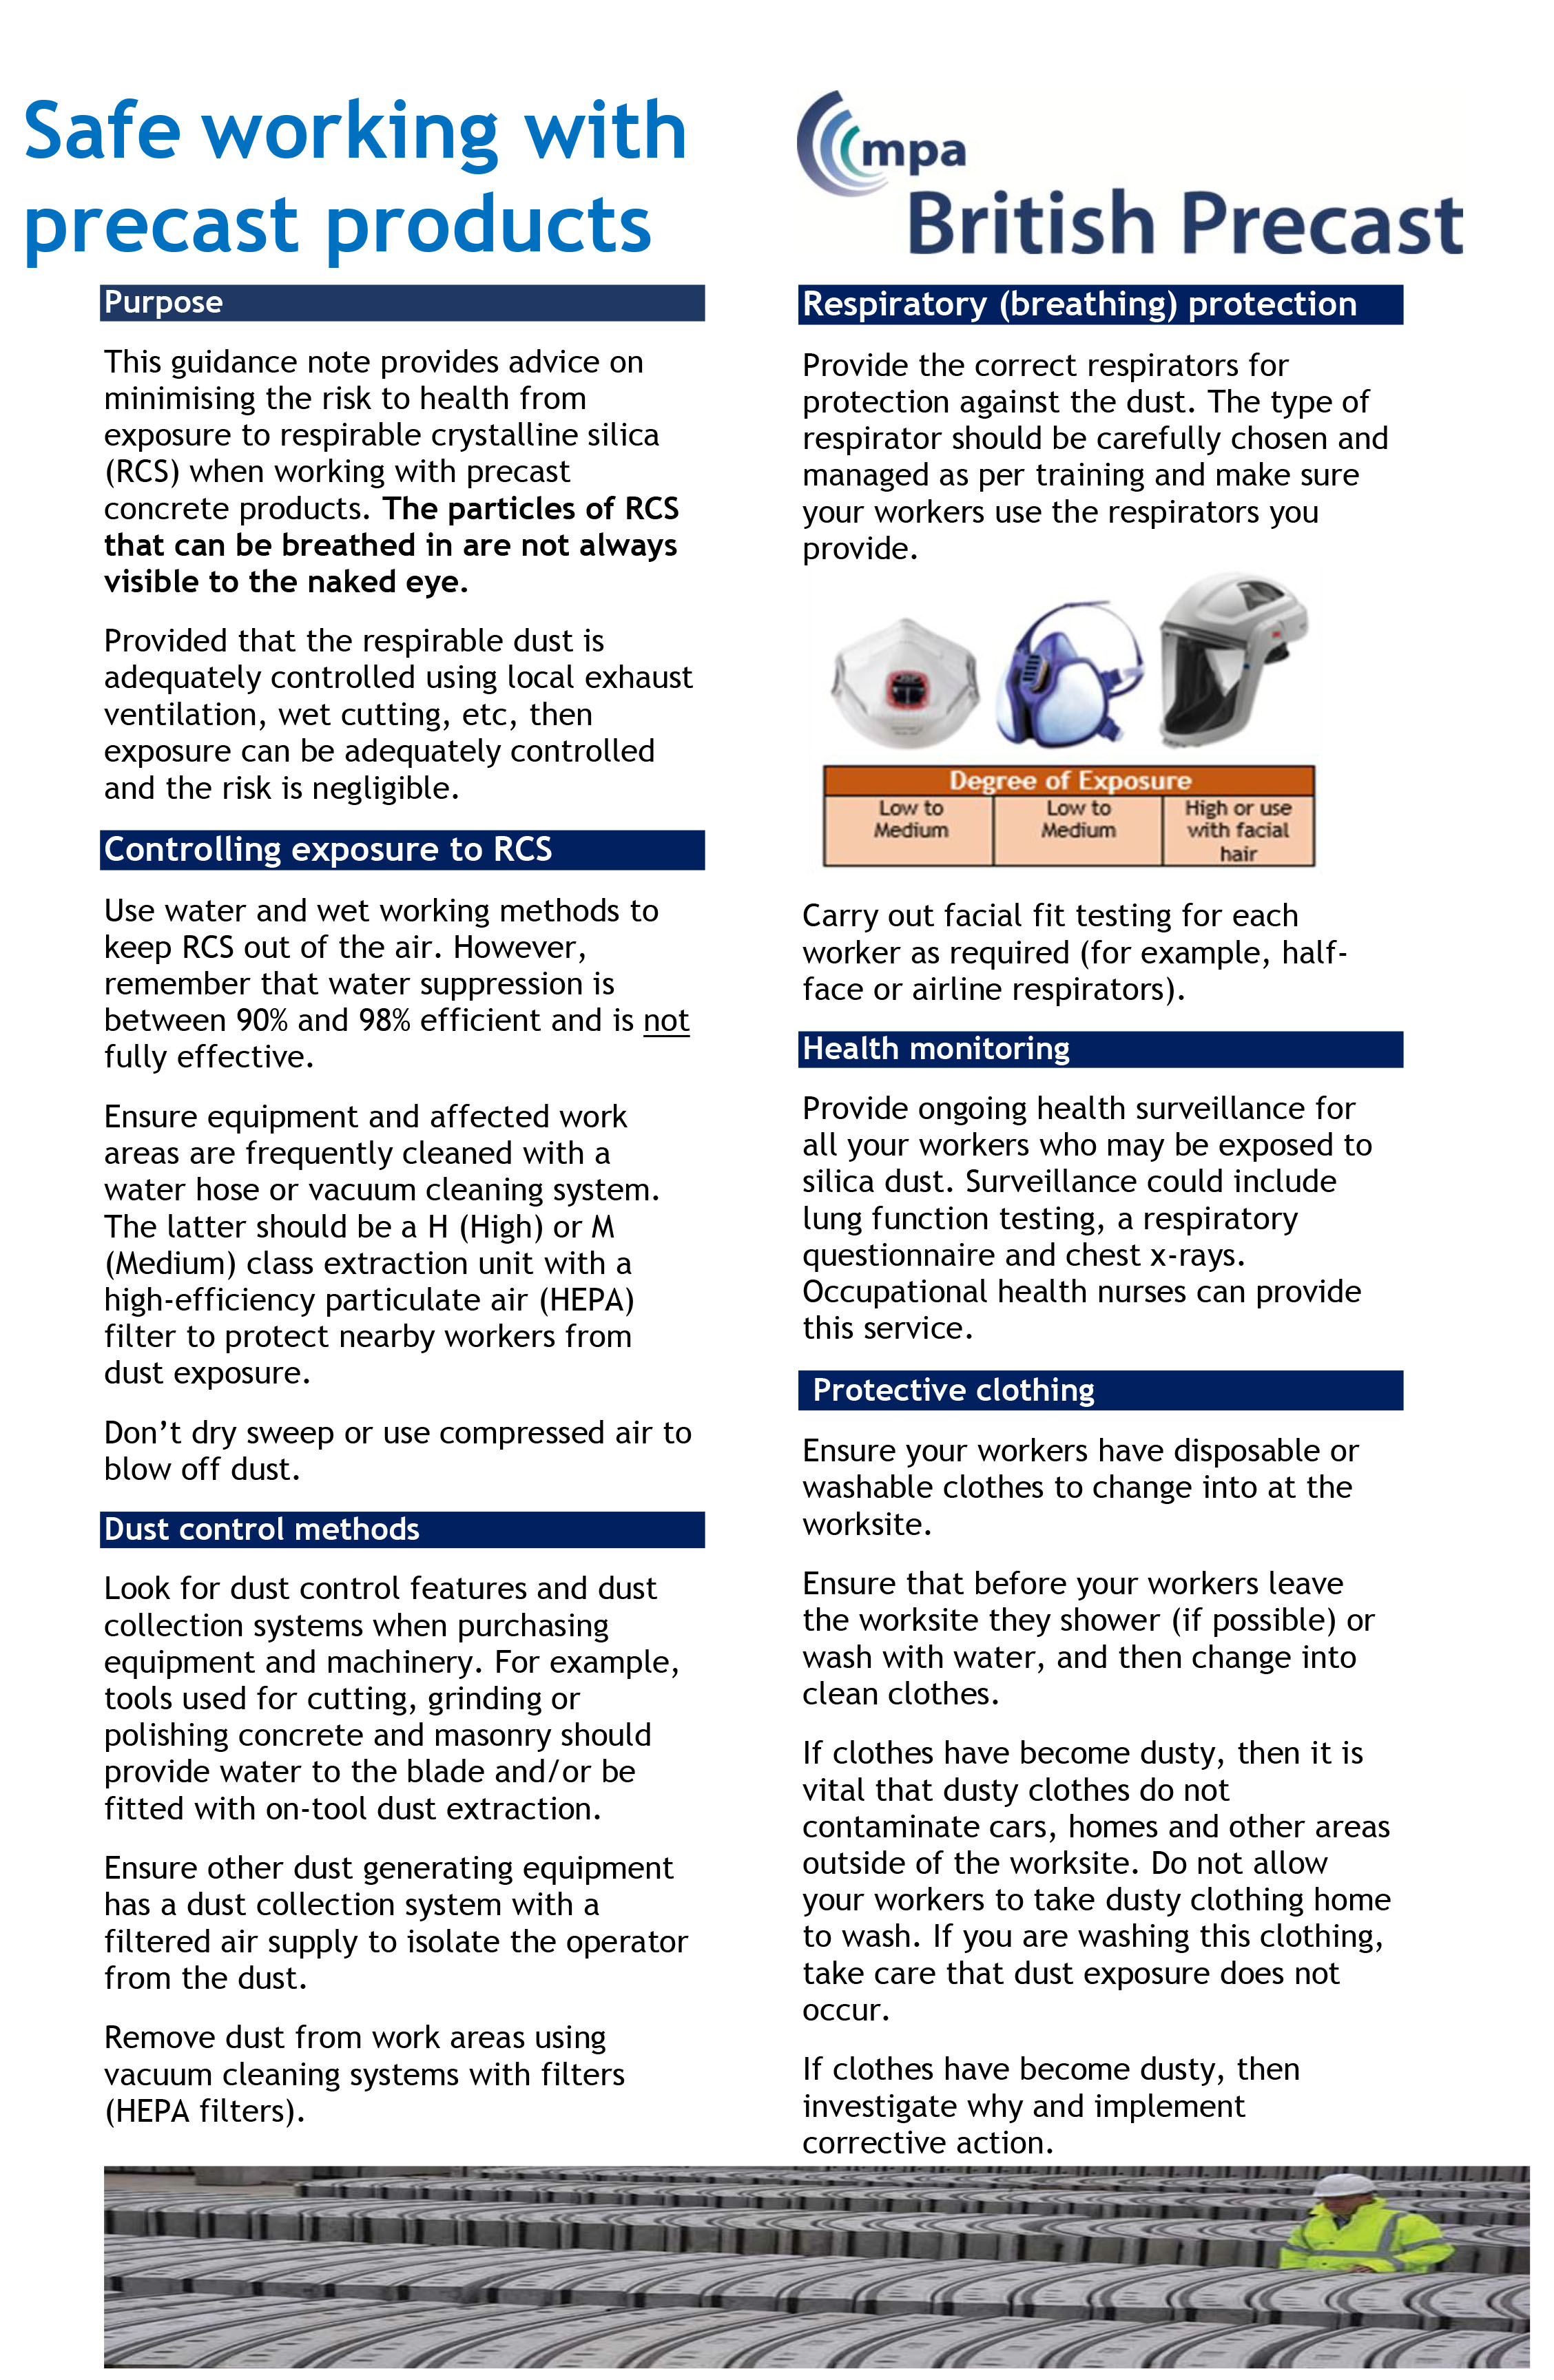
Doing things properly and responsibly is what Brett is all about. So, before starting work please take the time to read the following guidance from the British Precast Concrete Federation on safe working with concrete products.

Download the Safe Working with Precast Products Guide


Manual Handling

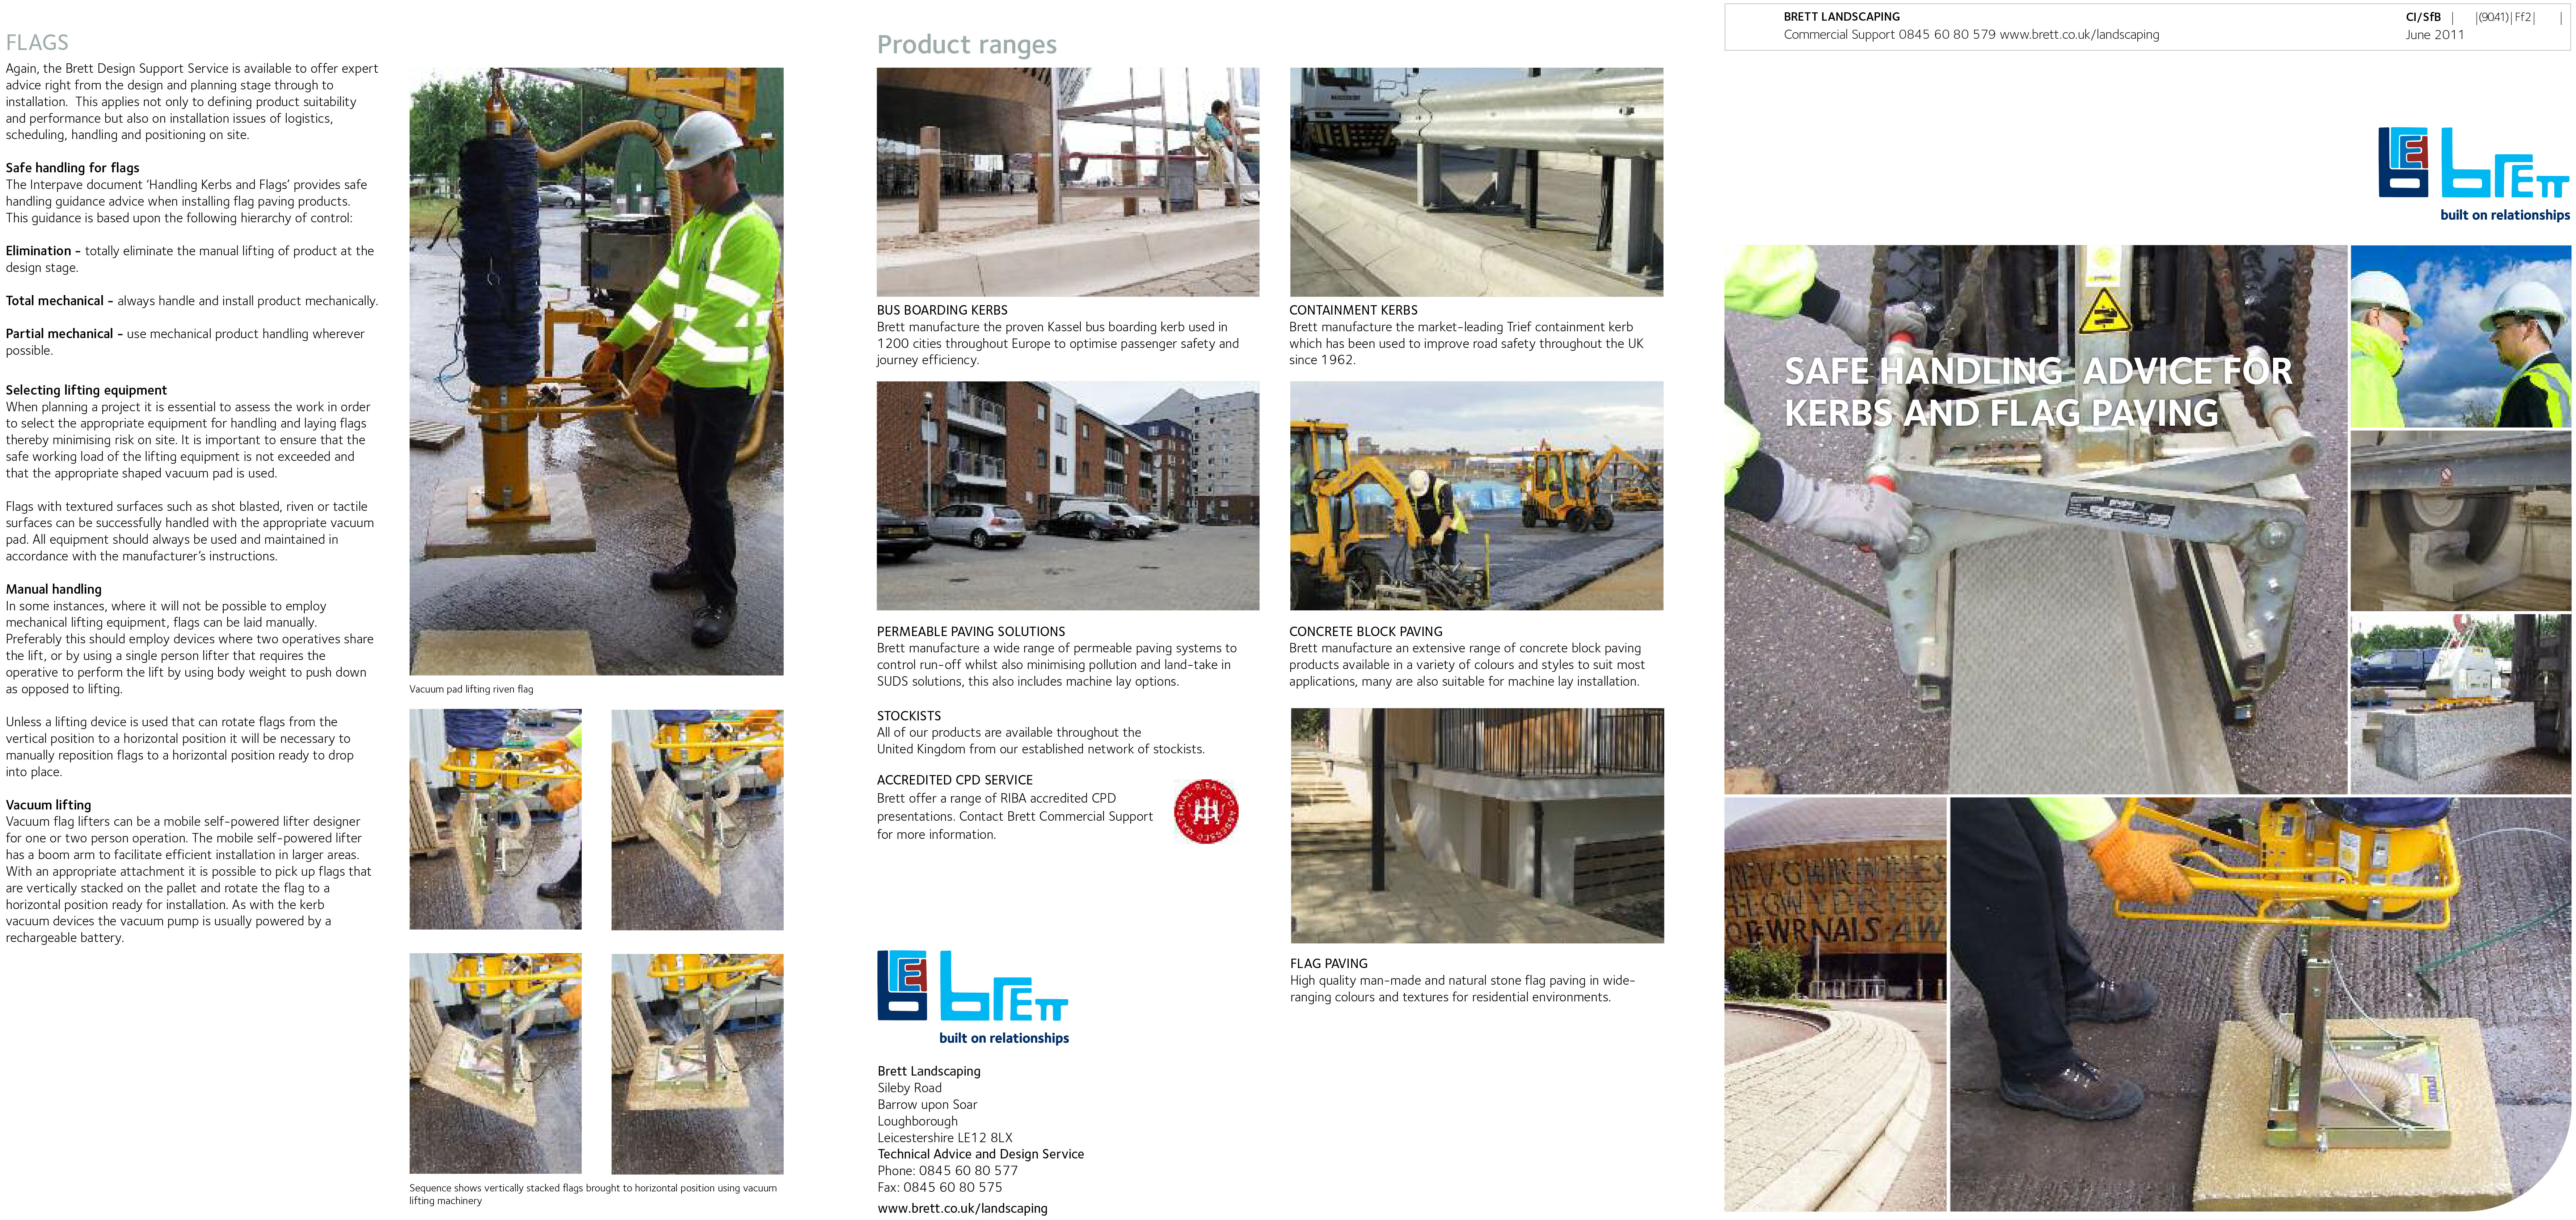
Many of our products are, by their very nature, heavy and will frequently require specialist lifting equipment. When used together with sensible handling precautions, it is possible to ensure a safe working environment during installation.

Of course, as always, the Brett team are here to advise and support you from the beginning of your project right through to the end. Contacting us at the very start of your project will help overcome many potential site handling issues , whilst helping design-out on-site cutting and unnecessary lifting.

Please click here to download our Manual Handling Guide

Please click here to download the Safe Working with Precast Products Guide


Sign up to our newsletter for our latest offers & inspiration